Easy Crochet Yarn Pumpkins: Free Step-by-Step Pattern
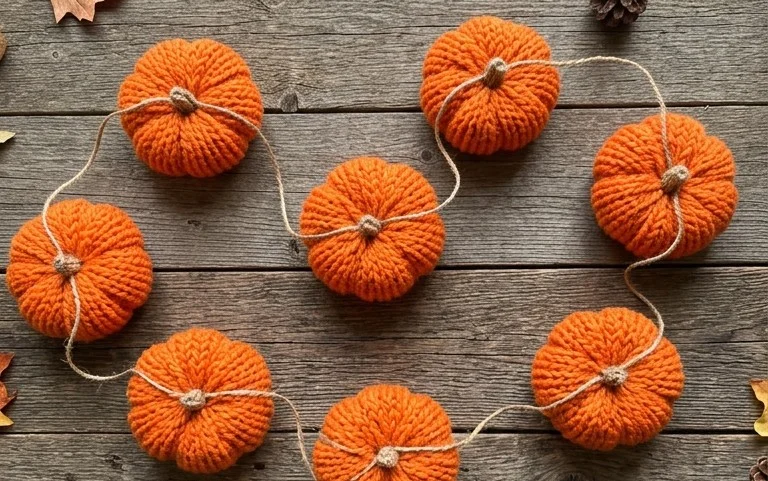
These plump yarn pumpkins sit firmly on a shelf, providing a satisfying weight that holds their shape throughout the autumn months. Using cotton yarn ensures the sides stay upright while keeping a smooth, tight finish that feels sturdy to the touch. This project suits anyone who wants a quick win, as it relies on simple single crochet stitches that repeat in a rhythmic way. Beginners will find the process forgiving, while more experienced makers can produce a handful of these in just one afternoon. Learning how to shape the core and gather the top creates a lovely, natural look for seasonal decor.
Why This Project Is Worth Making
This beginner-friendly project works up quickly, making it a satisfying choice for a single afternoon of crafting. It requires only basic single crochet stitches, which allows you to focus on maintaining even tension without the distraction of complicated patterns. Because it uses a small amount of yarn, it serves as an excellent way to use up leftover yarn from larger projects. The final result is a functional item that adds a handmade touch to your home or works well as a thoughtful, small gift for friends and family.
I managed to finish this in one evening while watching a show. The instructions are very clear for a beginner, and my finished item looks exactly like the photos.
— Sarah, hobbyist crafter
Pattern Overview & Skill Level
- Skill Level: Beginner
- Approximate Time: 2 to 3 hours
- Construction: Worked in continuous rounds from the center outward to create a flat circular base, then building upward to form the sides.
- Finished Dimensions: 4 inches in diameter and 3 inches in height.
Materials & Supplies Needed
- Yarn: Worsted weight (#4) cotton yarn, approximately 50 yards. Cotton provides the structure necessary for the sides to stand upright.
- Hook Size: 5.0 mm / H-8.
- Notions: Tapestry needle for weaving in ends, a locking stitch marker to track the start of each round, and a pair of scissors.
- Yarn Substitutions: Acrylic worsted weight yarn can be substituted, though the final item will be softer and may slouch more than a cotton version. If using wool, note that it will felt if washed in a machine.
Stitch Guide & Abbreviations (US Terms)
- ch: chain
- sc: single crochet
- inc: 2 sc in the same stitch
- sl st: slip stitch
- st(s): stitch(es)
- MR: magic ring; a technique for starting rounds by crocheting over an adjustable loop.
- BLO: back loop only; inserting the hook only under the back loop of the stitch instead of both loops to create a textured ridge or a clean fold.
Step-by-Step Pattern Instructions
Base
The base is worked in continuous rounds. Place a stitch marker in the first stitch of every round to keep track of your position.
- Rnd 1: Start 6 sc in a MR (6 sts).
- Rnd 2: 2 sc in each st around (12 sts).
- Rnd 3: [1 sc, inc] 6 times (18 sts).
- Rnd 4: [2 sc, inc] 6 times (24 sts).
- Rnd 5: [3 sc, inc] 6 times (30 sts).
Sides
The transition to the sides creates a defined edge.
- Rnd 6: Work in BLO, 1 sc in each st around (30 sts).
- Rnd 7-12: Work in both loops, 1 sc in each st around (30 sts).
- Finishing: Sl st into the next stitch to level off the edge. Cut the yarn, leaving a 6-inch tail. Pull the tail through the final loop and use the tapestry needle to weave the end securely into the interior of the piece.
Care & Washing Instructions
- Hand wash in cool water with a gentle detergent to maintain the shape of the cotton fibers.
- Lay the item flat on a towel to air dry, reshaping it with your hands while it is still damp.
- Avoid using a tumble dryer, as high heat can cause cotton to shrink and distort the stitch definition.
Pro Tips & Common Mistakes to Avoid
- If you find your stitches are too loose, drop down a half-size in hook to achieve a tighter gauge. A denser fabric helps the item hold its shape.
- Always use a stitch marker at the beginning of your rounds. In continuous round work, it is easy to lose count if you rely on sight alone.
- Weave your ends in by threading them through the back side of several stitches in different directions. This locks the yarn in place so it does not unravel over time.
- To adjust the size, simply continue the increase pattern on the base (e.g., [4 sc, inc] 6 times for 36 sts). Adding width to the base will require more yarn overall for the sides.
Frequently Asked Questions
Can I use a different yarn weight for this pattern?
Using a different yarn weight will significantly change the finished size. A lighter yarn will result in a much smaller item, while a bulkier yarn will produce a larger, stiffer piece. You may need to adjust your hook size accordingly to maintain a tight tension.
Is this project suitable for absolute beginners?
Yes, this project is designed for beginners. It focuses on the fundamental single crochet stitch and the concept of working in rounds, which are essential building blocks for almost all amigurumi and circular crochet projects.
How do I know if my tension is correct?
Your stitches should be tight enough that there are no visible holes between them. If you can see significant gaps, try using a smaller hook or consciously tightening your yarn pull after each stitch.
Can I sell the finished items made from this pattern?
You are welcome to sell finished items created from this pattern. Please credit the design to the original creator when listing your items online or at craft markets.
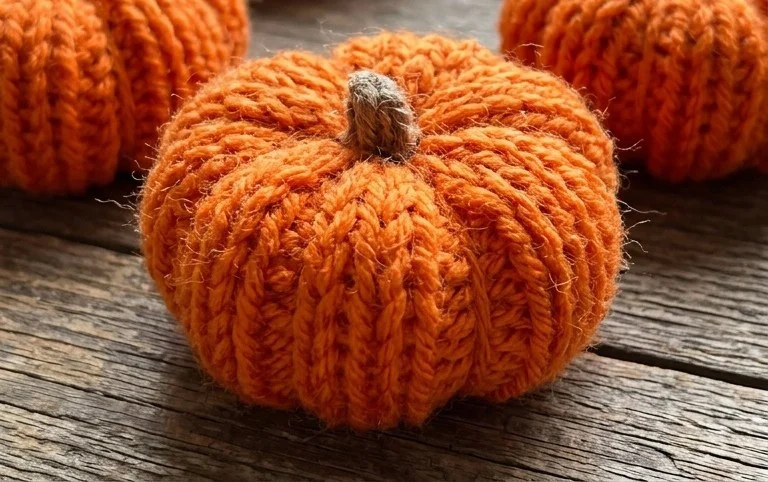
Displaying your finished work on a mantel or grouping three different sizes together brings a cozy, handmade quality to your living space. If you want a different aesthetic, try using velvet yarn for a softer, plush texture or metallic thread held with your main yarn for a subtle shimmer. Please post a photo of your creation on social media so others can see your color choices. You can find more free patterns for home decor and accessories by browsing the other sections of this blog.